Showing posts with label Black Powder. Show all posts

Saturday, January 31, 2015

Battle of Trenton 1776 game report & scenario

I have been wanting to play Trenton for a long time and after quite a while of painting and building the hardware was ready and I was left with the challenge to write an interesting game scenario for this extremely lop-sided battle. 

Because, whether you believe the Hessians to have been sober and vigiliant on Christmas morning 1776 or stumbling drunk and hung-over, fact remains that Washington's army not only surprised them but outnumbered them about 4 to 1 as well. In reality, as soon as Rall decided to stand and fight to reclaim his lost cannon, his fate was sealed. 


So I had to come up with something more interesting. I chose Black Powder for a ruleset and started out with troop sizes in somewhat historical proportions. So Washington would outnumber Rall about 4-5 to 1 from the outset. Rall only had his three regiments, a small unit of Jaeger and a small unit of dismounted Dragoons, besides his two guns. Washington would approach Trenton in 4 columns that approach Trenton from four predetermined sides. simultaneously, just like he did in reality. From that point on I slipped in a number of what-ifs. Roll a D8 om the following tables for each player before starting the game: 


  1. Washington: Column Mercer fails to cross
  2. Washington: Column Sullivan fails to cross
  3. Washington: Column St Clair fails to cross
  4. Washington: Column Mercer arrives D6 turns later
  5. Washington: Column Sullivan arrives D6 turns later
  6. Washington: Column St Clair arrives D6 turns later
  7. Washington: Knox' Artillery fails to cross
  8. Roll two times. Ignore another 8.  

  1. Rall: Donop's garrison arrives in turn D6.
  2. Rall: Rowdy Christmas Eve. Hangovers result in -1 Command roll first 2 turns
  3. Rall has 1 fortification built
  4. Rall has 2 fortifications built
  5. Rall has 3 fortifications built
  6. Rall: Morning patrol does not leave town but waits in Trenton
  7. Rall has D3 platoons of Jaeger
  8. Roll two times. Ignore another 8. 

I decided to forego all rules for bad weather and visibility and such.  The Hessians were dispersed in the houses of Trenton: 1 stand (= small unit) per house and 4 units to a regiment. The stands could either act as a small unit or could try to awake and regroup on a command roll of 8 or less. Two stands would still be a small unit. Only the Knyphausen regiment was awake and on their morning patrol on the far side of the table, marching away from Trenton. 


As it turned out this resulted in a fast scenario in which the Hessians usually try various ways to escape the Americans in time to prevent being destroyed. Some of the what-ifs shoud even tempt them to defend Trenton, like a combination of 1 and 5, given the fact that Donop's command is also 3 regiments and a gun strong. 

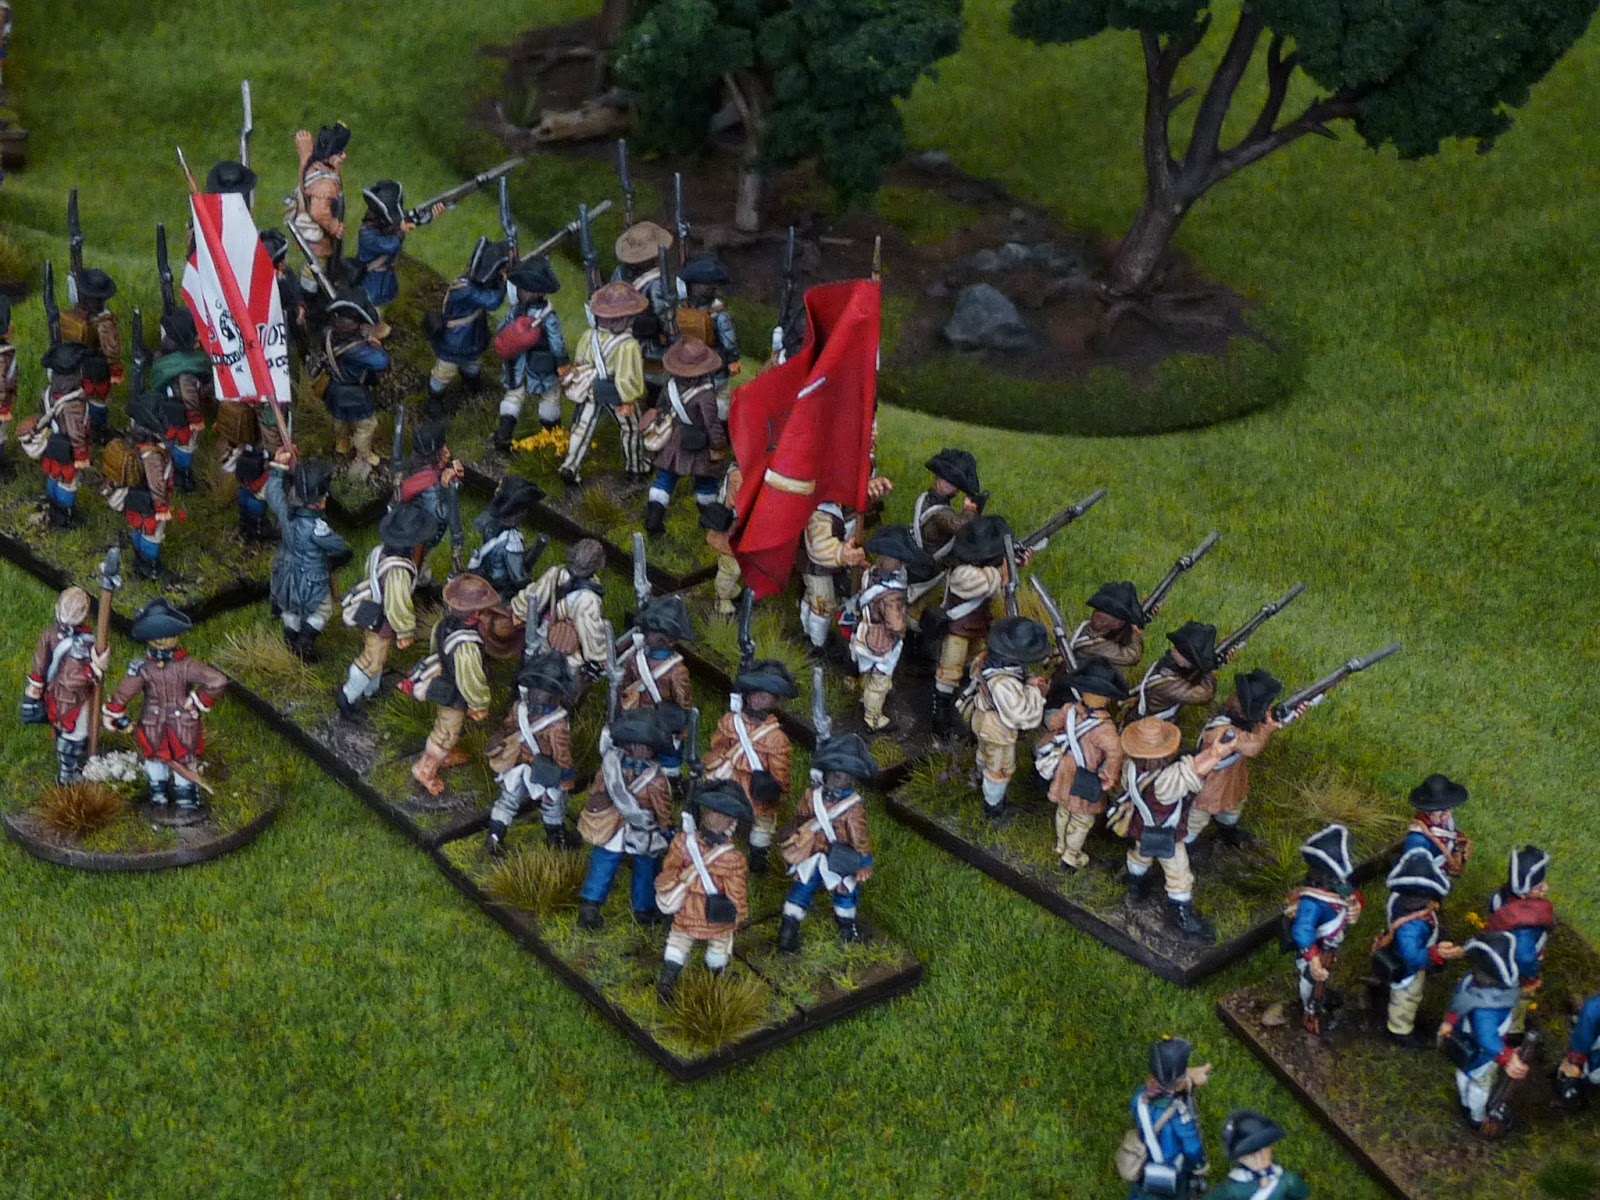
Some impressions of today's Ducosim con:


OOB as used in the game:

Hessians

Major Von Rall. Leadership 9
Grenadiers Von Rall L8: 1 regiment, +1 Morale & combat die, stamina 4, First fire, steady
Von Knyphausen L8: 1 regiment, First fire
Lossberg L8: 1 regiment, First fire
Jaegers: Small unit, Sharp shooters, marauders
Light Dragoons: Marauders (may mount)
2 guns

Optional: Donop L9
1, grenadier regiment, 2 Line regiments, 1 gun.

Continentals

George Washington: Leadership 10

Greene's L8 Column:
- Knox' artillery 4 guns
- 4 regiments: First Fire
- riflemen: small unit, sharpshooters

Mercer's L9 Column
- 4 regiments: First Fire
- riflemen: small unit, sharpshooters

Sullivan's L9 column
- 3 regiments: First Fire
- riflemen: small unit, sharpshooters

St. Clair's L8 column
- 3 regiments: First Fire
- riflemen: small unit, sharpshooters


Sunday, January 4, 2015

Trenton 1776: winter table

In order to play the Battle of Trenton I decided many moons ago to build me a winter table. Failing to complete it before Christmas I present it to you now. At least it's still winter here.

Top of the table runs Assunpink Creek, left top is the orchard and right center the town of Trenton. The Continental attack will in any case arrive from the top right and perhaps from other directions as well, depending on what I do with the scenario. 


I wanted to emphasize snow and cold so smoking chimneys were mandatory. They are made of stuff used to fill hamster's cages with.


Here the -now extinct-  New England Giant Cougar passes by. She is still in her winter coat; a perfect camouflage colour. If she lays still you can easily mistake her for a hill....


Unaware of war approaching, this 1/72 scaled citizen of New England transports his goods.


The morning patrol returning to Trenton.


A patrol of mounted Jaegers.


Jaegers guarding Assunpink Creek bridge.


Oberst Rall and a British acquintance of his on their morning ride.


The snowy fields East of Trenton.


The reverend preparing the sermon, seeking inspiration in the morning sun.


 Street views


Another shot of the morning patrol, looking past the Grenadiers Von Rall.


Some aerial pictures.


The terrain is made from two paper "snow" blankets sold around Christmas, glued together with PVA glue and painted with acrylics. Houses are either scratch built of papercraft houses, mainly from this site that hosts historical buildings from Illinois.

Fences are scratch built, walls are resin from some unknown manufacturer and the bare trees are bought on Ebay or at a Christmas sale (the snowy firs).

Sunday, August 17, 2014

Black Powder: Rebellion!

This week I received my pre-ordered copy of Black Powder: Rebellion! It has been a long wait but it was worth it! Ever since Black Powder came out I have used it to play the American Revolution. At the time no one was very enthusiastic about the period so I decided to collect and paint all sides myself and do it in nostalgic 20mm plastic. So now I have over 800 20mm figures and the rest of the world has in the meantime started collecting 28mm Perry and Warlord.... But that is another story; on with the review!


"Rebellion!" is a supplement for the Black Powder wargaming rules, aimed at playing the American War of Independence or American Revolutionary War, depending on which side of the pond you're from . It is a book like we have come to expect from Warlord Games: a hefty 149-page full colour softcover folio filled with (excusez le mot) "wargames porn". Every page spread shows illustrations and lovely photographs of someone's expertly painted (yes...28mm) collection. The editor of this book is apparently a follower of the "blurred bases" philosophy as almost all bases have been photoshopped away, but that is about the only gripe I have about the illustrations.


The book is meant both for players who are knowledgeable about the period and for the debutantes. It starts with a 16-page concise history of the American Revolutionary War. As one would suspect reading the title, the British authors have foregone the term War of Independence. While 16 pages cannot possibly deal with all the intricacies of this complicated conflict the book does succeed in presenting a consistent and comprehensive summary. If you know nothing about the American Revolution and want to learn the wider scope of the military side of it, you could do worse than reading this.

The book then describes in detail the British, Loyalist, German, Continental (American) and French armies. Lists of all participating regiments are given and the organisation is explained, which is no sinecure when it comes to the Continental troops as their organisation varied with the colonies from where the troops originated as well as in time, as Congress adopted different rulings on drafting and recruiting as the war progressed. The lists mention uniform colours, periods of service and the battles the units took part in. Very useful for writing scenarios!

Then weapons and tactics are briefly discussed, followed by portraits of the famous (or notorious) commanders of the conflict. Dashing Tarleton, treacherous Arnold and pompous Gates are all there, together with their opponents and compatriots.

Then, on page 62, the book arrives at its true treasure: the scenarios!

As you may or may not know, Black Powder is a generic ruleset aimed at playing the battles of a 200-year period starting around 1700 AD. With such a scope, the characteristics of any specific conflict are not likely to emerge and the rules risk being a rather bland mix of everything. The designers have cleverly countered that by designing a few dozen Special Rules which you can add to units. This way, for example, American Frontiersmen with rifled muskets may be Sharpshooters that reroll misses, making them deadlier shots than their smoothbore musket-armed opponents. One can even vary this Special Rules depending on the scenario. Regiments that are Unreliable in early battles, gain experience and exchange this Special Rule in time for Steady, as they become drilled veterans.

The authors describe all Special Rules in relation to their vision on the Revolution. Some, like Heavy Cavalry and Form Square, are permanently discarded . For the rest it is described what their function can be and how they can be used to influence the specific scenario, when one wants to get a particular balance between the opposing forces. While you may not agree with the authors' ideas, it does give a particular Revolutionary flavour to the rules.


The book then gives you a whopping 19 scenarios ranging from the massive battles of Monmouth and Brandywine to small skirmishes like Gloucester Point, the latter deftly defeating the prejudice that you need a million figures to play Black Powder with opposing forces of 12-14 figures in strength!

Not surprisingly the book also gives valuable suggestions for playing with smaller units, as battles of the period were often fought between small groups of soldiers. Using Company stands instead of Regimental lines will enable you to play the smaller scenarios a lot sooner than you will have painted the large forces that you will need for something like Guilford Courthouse. The book ends with a recommendation for further reading on the period.

This is all that the first read of the book allows me to write as a review. As you may gather from it, my first impression is very favorable. Whether you are already invested or merely interested in the period, Black Powder Rebellion! is a fine purchase.

As I am in the luxurious position to play most scenarios with the figures I already have, now is the time to go finish my winter table and play Princeton!

Rebellion!, a Black Powder supplement
by Stephen Jones
Published by Warlord Games 2014
Price 20 GBP

Sunday, April 20, 2014

Battles & Beer!

This  weekend we enjoyed our bi-monthly Battles&Beer Saturday at the Karwansaray premises.

The day definitely an American flavour since we played Muskets & Tomahawks and Blackpowder AWI. Jasper showed his concept for big games with few figures by using single stands for entire battallions. It worked very well and gave us a lot of units on a relatively huge table.


It was gorgeous weather, so a perfect day to shut ourselves indoors with out tin soldiers!


The American Rebels scored a smashing victory on the unlucky British.

We concluded the day with bock beer and delicious food.

Witchfinder General next time!

Sunday, February 16, 2014

Battle of Mons 2014

A hundred years after the event we played the battle of Mons (well, a scenario of mine inspired by the battle) with the Black Powder rules that worked surprisingly well. The BEF was supposed to stall as long as possible and deny the bridges to the Hun, while the Germans were tasked with capturing the bridges and inflicting hurt on the small BEF.

Some pictures of the battle, played at Owen's place with 15mm figures. The dastardly Huns won on points, because the Eastern bridge refused to blow and those plucky Tommies stayed in position too long for a timely escape....


The Huns (them...)


The Tommies (Us...) 


The battlefield, with the village of Nimy in the lower left corner


Belgian refugees flee before the Hunnish hordes. Lovely Taube plane made by Peter Pig and painted by Owen. 


The center bridge blows!


Nimy railway bridge standing firm


Eastern bridge unfortunately standing firm as well, after our attempt to demolish it failed spectacularly!


Consequently the Germans stormed and took it...


The end: German reinforcements turn up on the British flank and advance through Nimy, charging the defenders in the flank.