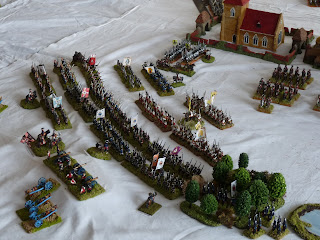
Today we played the Battle of Leuthen (december 5th 1757) using the Black Powder rules and Owen´s magnificent Seven Year War armies. On the snowy plains of Leuthen the Prussian and Austrian armies clashed in the perfect example of the oblique attack.
Above an Austrian ponders his position while another one takes aerial photographs of the battlefield. In the center the church of Leuthen can be seen, flanked above and below by the Austrian lines, who have formed up to oppose the Prussians coming in from the left. This was a mere feint however and the main Prussian army is actually advancing from the lower part of the picture, facing only the Austrian left wing.
The village of Leuthen
Austrian grenadiers
Here the Prussian line forms up on the extreme left flank of the completely outmaneuvered Austrians, who now had to choose between defending their position or falling back on Leuthen as soon as possible.
The mill in the Austrian center.
The Austrian left wing refuses to respond to commands and motionlessly watches the advancing Prussians. Folkert and I thought Ol´ Frederick´s plan still seemed sound so we simply repeated it, driving full speed towards Leuthen.
The Wurttemberg regiments caught the full force of the Prussian attack, murderous volley followed by devastating bayonet attack, and were obliterated.
Chaos and disorder among the Bavarians.
A fierce firefight and combat ensued between the Prussian line and the Bavarian regiments. In the Austrian center Italians tried their utmost NOT to get stuck in and Austrians hurried towards a spectacular cavalry battle.
The Bavarians brushed aside, a few Austrian cavalry units desperately try to stem the tide. Opposite the Austrian center the Prussian left wing is pushed back by Austrian cavalry (top of the picture) but it is too little, too late....
The triumphant Prussians advance, breaking the final units of the Austrian left wing. Their center too far away to participate in the battle, the Austrians break and clear the field.
This is probably the first time I ever played a historical battle using the exact same battle plan as the historial commander with the exact same historical result!


